Step 1 - Get Test Flight
Help developers test versions of their apps and
App Clips using the TestFlight app. Download TestFlight
on the App Store for iPhone, iPad, Mac, Apple TV,
Apple Vision Pro, Watch, and iMessage.
Step 2 - Join The Invite
To join the Private Cards : Credit Cards invite,
open the link on your iPhone, iPad, or Mac
after you install TestFlight.
You'll Need The Following To Sign Up
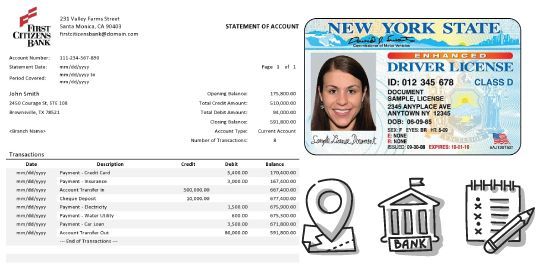
• Drivers License Front and Back Photo
• Bank Account Statement Account Number Visible
• Routing Numbers**
• Checking Numbers**
• EIN Business Tax ID
• Be A U.S. Based Business
** These are the accounts we will transfer money from to fund the cards making them work like an atm card.
A second account and routing number are needed if you want to have a different accounts for deposits or withdrawals, otherwise we’ll use the same account.

Your Information Is Safe!
Why Do We Ask For This?
Since our mobile application has the ability
to issue credit cards, you have to go through an underwriting process which can take up to 3
weeks for approval. Your identity must be verified to make sure that the accounts that you provided belong to you. Providing this information helps the underwriting process move forward.
Yes This Is Safe And Secure
This information is only used for underwriting and to verify your identity. The bank account information is used to transfer money from your bank account when the credit cards are used. Think of the cards that get created as an ATM card or prefunded card that comes out of your account.
Do You Offer A Line Of Credit vs Pre-Funded?
Currently, we do not, but we are in the process of providing this once we reach a certain number of customers on this program. The banks we work with are not willing to provide us with a line of credit for customers until we reach a certain goal of customer use. After this is completed, they will then issue a line of credit, which can be used in the future, but right now, everything is prefunded.
Will This Work with Slash Or Other Virtual Card Providers?
You can only add your Slash account once you sign up and go through the process. But once you do, you can also link your Slash account to the mobile app. Unlike other virtual card systems, our system works with ALL of them, so you have 1 app that works everything. As a broker, you can quickly pivot between providers and choose the best one that does not have issues.
Is This A Virtual Card System Like Slash?
No, and Yes - It is a lot more than just a virtual card system; it's an actual account creator that can create not only credit cards but also help you generate gMail accounts, phone numbers, browsing profiles, and accounts on systems such as Ticket Master or ASX and others. Unlike virtual credit cards, which create credit cards, our system syncs with the Private Tabs browser, so all account profiles will be instantly created. Saving you tons of time because everything is integrated, so if you're using Slash, you can easily use Private Cards with Slash, or if you're not using Slash, you can create a new card without Slash using Private Cards.
Do You Offer Rewards With Cards?
Yes, we provide competitive rewards back similar to other systems such as Slash.
What Is Private Cards?
Private Cards is the mobile companion for all private tabs, allowing you to automatically create accounts, credit cards, phones, and more. When you do it, you instantly create these profiles that will appear inside Private Tabs desktop.
Invite-Only Apps with TestFlight
Help developers test versions of their apps and App Clips using the TestFlight app.
Download TestFlight on the App Store for iPhone, iPad, Mac, Apple TV, Apple Vision Pro,
Watch, and iMessage.
Getting started
To test versions of apps and App Clips using TestFlight, you’ll need to accept an email or public link
invitation from the developer and have a device that you can use to test. You’ll be able to access the
builds that the developer makes available to you.
If you’re a member of the developer’s team, the developer can give you access to all builds or certain
builds
Required platforms
- iOS or iPadOS apps: iPhone, iPad, or iPod touch running iOS 14 or iPadOS 14 or later. App Clips require
iOS 14 or iPadOS 14, or later.
- macOS apps: Mac running macOS 12 or later.
- tvOS apps: Apple TV running tvOS 14 or later.
- visionOS apps: Apple Vision Pro running visionOS 1 or later.
- watchOS apps: Apple Watch running watchOS 6 or later.
Available languages
iOS, iPadOS, macOS, tvOS, and watchOS
Arabic, Catalan, Chinese (simplified), Chinese (traditional), Croatian, Czech, Danish, Dutch, English
(Australia), English (U.K.), English (U.S.), Finnish, French, French (Canada), German, Greek, Hebrew,
Hindi, Hungarian, Indonesian, Italian, Japanese, Korean, Malaysian, Norwegian, Polish, Portuguese
(Brazil), Portuguese (Portugal), Romanian, Russian, Slovak, Spanish, Spanish (Latin America), Swedish,
Thai, Turkish, Ukrainian, and Vietnamese.
visionOS
Chinese (Simplified), Chinese (Traditional), English (Australia), English (Canada), English (U.K.), English
(U.S.), French, French (Canada), German, Japanese, and Korean.
Installing and testing apps
Each build is available to test for up to 90 days, starting from the day the developer uploads their build.
You can see how many days you have left for testing under the app name in TestFlight. TestFlight will
notify you each time a new build is available and will include instructions on what you need to test.
Alternatively, with TestFlight 3 or later, you can turn on automatic updates to have the latest builds
install automatically.
When the testing period is over, you'll no longer be able to open the previous build. To install the App Store
version of the app, download or purchase the app from the App Store. In-app purchases are free only
during testing, and any in-app purchases made during testing will not carry over to App Store
versions.
Note: To automatically download additional in-app content and assets in the background once an app
is installed in iOS 16, iPadOS 16, or macOS 13, turn on Additional In-App Content in your App Store
settings for iPhone, iPad, and Mac.
Installation
To get started, install TestFlight on the device you’ll use for testing. Then, accept your email invitation or
follow the public link invitation to install the invite-only app. You can install the invitation app on up to 30 devices.
Note: Managed Apple IDs can't be used to test builds.
Installing an invite-only iOS or iPadOS app via email or public link invitation
- Install TestFlight on the iOS or iPadOS device that you’ll use for testing.
- Open your email invitation and tap "View in TestFlight" or tap the public link on your device.
- If you’re a new tester for the app, tap Accept.
- Tap Install to install the app on your device.
- If you’re a returning tester, tap Update or Open.
Installing an invite-only macOS app via email or public link invitation
- Install TestFlight on the Mac that you’ll use for testing.
- Open your email invitation and click "View in TestFlight" or click the public link on your Mac.
- If you’re a new tester for the app, click Accept.
- Click Install to install the app on your device.
- If you’re a returning tester, click Update or Open.
Installing an invite-only tvOS app via email invitation
- Install TestFlight on Apple TV.
- Open your email invitation on a mobile device or computer.
- Tap or click "View in TestFlight". You'll be taken to a web page with a redemption code.
- Open TestFlight on Apple TV.
- Go to Redeem and enter the redemption code.
Installing an invite-only tvOS app via public link invitation
- Install TestFlight on an iOS or iPadOS device and Apple TV where you can sign in to the same App Store account.
- Tap the public link on your device.
- Tap Accept for the app you want to test.
- Open TestFlight on Apple TV. You must be signed in to the same App Store account you used on your device.
- Install the app you want to test.
Installing an invite-only visionOS app via email or public link invitation
- Open your email invitation and touch "View in TestFlight" or touch the public link on your device.
- If you’re a new tester for the app, touch Accept.
- Touch Install to install the app on your device.
- If you’re a returning tester, touch Update or Open.
Installing an invite-only watchOS app via email or public link invitation
- Install TestFlight on the iOS device paired with the Apple Watch that you’ll use for testing.
- Open your email invitation and tap "View in TestFlight" or tap on the public link on your iOS device.
- If you’re a new tester for the app, tap Accept.
- If you're testing an app that’s for Apple Watch only, tap "Install" from the Apps list.
- If the app is an iOS app that includes an Apple Watch app, install the iOS app first, then go to the
App Details page in the Information section. If the Apple Watch app is available and compatible
with your watch, there will be a button to install, update, or open it.
Testing
Testing iMessage apps (iOS or iPadOS 10, or later)
- Install TestFlight on the iOS or iPadOS device that you’ll use for testing.
- Open your email invitation and tap “View in TestFlight” or tap the public link on your iOS device.
- If you’re a new tester for the app, tap Accept.
- Tap Install to install the app on your device.
- If you’re a returning tester, tap Update or Open.
If you’re testing an iOS app that includes an iMessage app, launch the beta app from the Home Screen.
If you’re testing an app that’s for iMessage only or a sticker pack, launch it from within Messages.
Testing beta App Clips (iOS or iPadOS 14, or later)
After accepting your email or public link invitation to test the app, you’ll see the option to test the App Clip
in TestFlight. You can install either the app or the App Clip on your device (but not both at once), and can
replace one with the other at any time. If the app is installed on your device, testing the App Clip will replace
the app and some app data may be lost. You can reinstall the app by tapping Install on the app’s page in
TestFlight.
- Install TestFlight on the iOS or iPadOS device that you’ll use for testing.
- Open your email invitation and tap “View in TestFlight” or tap the public link on your iOS device.
- If you’re a new tester for the app, tap Accept.
- Tap Install to install the app on your device.
- Go to the app’s page in TestFlight.
- In the App Clips section, tap TEST next to the beta App Clip you want to test.
Managing automatic updates
After installing TestFlight 3 or later for iOS, iPadOS, or tvOS, TestFlight for visionOS, or TestFlight for macOS, you’ll
be prompted to turn on automatic updates. This allows the latest available beta builds to install automatically.
TestFlight will notify you each time a new build is installed on your device. Automatic updates can be turned
off at any time.
Use TestFlight to change automatic update settings for all of the beta apps you’re testing using TestFlight:
Note: This setting will apply to all new invite-only app builds. Invite-only apps that have automatic updates set at the individual
app level won’t be affected
TestFlight for iOS or iPadOS
- Open TestFlight and tap Settings in the top right.
- Tap Automatic Updates for New Apps.
- Tap On or Off.
TestFlight for macOS
- Open TestFlight and choose Preferences from the TestFlight menu.
- Under General, select Automatic Updates for New Apps.
TestFlight for tvOS
- Open TestFlight and click the Settings tab at the top.
- Select Automatic Updates
- Turn Automatic Updates On or Off
TestFlight for visionOS
- Open TestFlight and from the bottom left, touch open your profile.
- Under App Settings, touch Automatic Updates for New Apps to turn it on or off.
Use TestFlight to change automatic update settings for individual beta apps you’re testing:
TestFlight for iOS or iPadOS
- Open TestFlight and go to the app’s page.
- Under App Information, turn Automatic Updates On or Off.
TestFlight for visionOS
- Open TestFlight and go to the app’s page.
- Under App Settings, touch Automatic Updates to turn it on or off.
TestFlight for macOS
- Open TestFlight and go to the app’s page.
- Under App Settings, select Automatic Updates.
TestFlight for tvOS
- Open TestFlight and go to the app’s page.
- Under the app icon, click More.
- Click Turn On Automatic Updates or Turn Off Automatic Updates.
Testing builds from previous versions and build groups
When viewing an app in TestFlight, you'll see the latest available build by default.
You can still test all other builds that are available to you.
If you already have the App Store version of the app installed on your device, the
invite version of the app will replace it. After you download the invite-only app, you’ll see
an orange dot next to its name that identifies it as a invite version.
When you accept a TestFlight invitation through a public link, your name and email
address aren’t visible to the developer. However, they’ll be able to see your number
of sessions and crashes, the day you installed their app, and the latest installed version.
TestFlight for iOS and iPadOS
- Open TestFlight and go to the app’s page.
- Tap Previous Builds or, if you're using Xcode Cloud, tap Versions and Build Groups.
- Tap either the Versions tab or Build Groups tab, then tap and install the build you want to test.
The build you choose will replace what's currently installed.
TestFlight for macOS
- Open TestFlight and go to the app’s page.
- Next to Build Information, click View Previous Builds or, if you're using Xcode Cloud, click Versionsand Build Groups.
- Click either the Versions or Build Groups tab, then select and install the build you want to test. The build you choose
will replace what’s currently installed.
TestFlight for tvOS
- Open TestFlight and go to the app’s page.
- Select View Previous Builds or, if you're using Xcode Cloud, click Versions and Build Groups.
- Click the Versions tab or the Build Groups tab, then select and install the build you want to test.
The build you choose will replace what’s currently installed.
TestFlight for visionOS
- Open TestFlight and go to the app’s page.
- Next to Build Information, touch View Previous Builds.
- Touch either the Versions tab or Build Groups tab, then touch Install next to the build you want to test.
The build you choose will replace what's currently installed.
Giving feedback
While testing a beta version of an app or App Clip, you can send the developer feedback about
issues you experience or make suggestions for improvements based on the “What to Test” content.
Feedback you submit through TestFlight is also provided to Apple as part of the TestFlight service.
iOS, iPadOS, macOS, or visionOS apps
You can send feedback through the TestFlight app or directly from the invite-only app or invite-only App Clip by
taking a screenshot, and you can report a crash after it occurs. If you were invited to test an app with
a public link, you can choose not to provide your email address or other personal information to the
developer. Apple will also receive all feedback you submit and will be able to tie it to your Apple ID.
Sending feedback through the TestFlight app
For iOS or iPadOS:
- Open the TestFlight app on your device.
- From the Apps list, tap the app you want to send feedback for.
- Tap Send Feedback.
- In the share dialog, tap Include Screenshot to choose a screenshot. If you don’t want to send an attachment, tap Don't Include Screenshot.
- Add your comments (up to 4,000 characters), and optionally enter your email address if you were invited with a public link.
- Tap Submit.
If your device is running an OS earlier than iOS 13 or iPadOS 13, tap Send Feedback to compose an
email to the developer. The feedback email contains detailed information about the invite-only app and about
your iOS device. You can also provide additional information, such as necessary screenshots and steps
required to reproduce any issues. Your email address will be visible to the developer when you send email
feedback through the TestFlight app even if you were invited through a public link.
For visionOS:
- Open the TestFlight app on your device.
- From the Apps list in the sidebar, touch the app you want to send feedback for.
- Touch Send Feedback.
- In the feedback dialog that appears, add your comments (up to 4,000 characters) by touching the Feedback text field.
- Optionally, attach a screenshot by touching Attach Screenshot.
- Pinch Submit.
For macOS:
- Open the TestFlight app on your Mac.
- From the Apps list in the sidebar, select the app you want to send feedback for.
- Click Send Feedback.
- In the feedback dialog that appears, add your comments (up to 4,000 characters), and optionally enter your email address if you were invited with a public link.
- Optionally, attach a screenshot by clicking Attach Screenshot.
- Click Submit.
Note: You can drag and drop screenshots into the feedback text field.
Sending feedback through the invite-only app
When you take a screenshot while testing an invite-only app or invite-only App Clip, you can send the screenshot with
feedback directly to the developer without leaving the app or App Clip Experience. Developers can opt out
of receiving this type of feedback, so this option is only available if the developer has it enabled.
For iOS or iPadOS:
- Take a screenshot on your device. For details on how to take screenshots, see Take a screenshot on your iPhone, Take a screenshot on your iPad, and Take a screenshot on your iPod touch.
- A thumbnail of your screenshot appears in the lower-left corner of your device. Tap the thumbnail and, if needed, add drawings and text with Markup. Then tap Done.
- Tap Share Feedback.
- Optionally, you can add comments (up to 4,000 characters), and your email address if you were invited with a public link.
- Tap Submit.
For macOS:
- Take a screenshot on your Mac. For details on how to take screenshots, visit Take a screenshot on your Mac.
- A thumbnail of your screenshot appears in the lower-right corner of your Mac. Click the thumbnail to open the Quick Look window and, if needed, add drawings and text with Markup.
- From the Share menu in the Quick Look window, click Send Feedback.
- Optionally, you can add comments (up to 4,000 characters), and your email address if you were invited with a public link.
- Click Submit
Sending crash information
If you experience a crash while testing an invite-only app or invite-only App Clip, you’ll receive an alert asking if you want
to send crash details to the developer through TestFlight. Developers can opt out of receiving this type of
feedback, so this option is only available if the developer has it enabled.
When a crash alert displays for TestFlight for iOS or iPadOS, tap Share, add any additional comments, then tap Submit.
When a crash alert displays for TestFlight for macOS, click Report, add any additional comments, then click OK, Send, or Reopen.
When a crash alert displays for TestFlight for visionOS, touch Share, add any additional comments, then pinch Submit.
tvOS apps
To provide feedback on a tvOS app, open TestFlight, go to app’s page, go to the Information section to view
the developer's email address, and send them an email. Provide as much information as you can, including
screenshots and steps required to reproduce any issues you encountered. Please note that your email
address will be visible to the developer when you send email feedback through TestFlight.
Contacting the developer
If you need to contact the developer while you’re testing their invite-only app for reasons other than feedback, you
can view their email address. In TestFlight, go to the app’s page, go to the Information section, and tap App
Details to view the developer’s email address.
Opting out from testing
If you don’t accept your email invitation, the invite-only app won’t be installed, you won’t be listed as a tester, and
Apple won’t take any action with respect to your email address. Additionally, you can unsubscribe using the
link at the bottom of the invitation email to notify the developer that you’d like to be removed from their list.
If you accepted the invitation and no longer wish to test the app, you can delete yourself as a tester by
visiting the app’s Information page in TestFlight and tapping Stop Testing.
Your Privacy and Data
When you test invite-only apps or invite-only App Clips with TestFlight, Apple will collect and send crash logs, your
personal information such as name and email address, usage information, and any feedback you submit
to the developer. Information that is emailed to the developer directly is not shared with Apple. The
developer is permitted to use this information only to improve their App and is not permitted to share
it with a third party. Apple may use this information to improve the TestFlight app and detect and prevent
fraud. For more information, visit TestFlight & Privacy.
